Pages

Sunday, November 27, 2011

DIY Ornament Wreath

There are gobs of cute ornament wreaths all over Pinterest, and I finally got around to making my own!


I followed a very nice tutorial from Andrea, and there are plenty of others out there so I won't bore you with the repeat here.  I found these fun silver ornaments at Winco (of all places!) and they were even cheaper than the dollar store options.  I used 70 ornaments total.  The best part?  The globe snaps into the hook on the ornament so there was none of the tedious gluing required on the other tutorials.  I think Winco is also called Cub Foods in some areas (wink wink Minnesota girls!).

Our door is super tall so standard over-the-door wreath hangers weren't working.  We found a really nice decorative metal Command Hook at Home Depot and adhered it to the door.  It's sturdy, but removable so I'm not worried about damaging the door surface.

Come knock on our door!  We are super festive!


Tuesday, November 22, 2011

ETSY Find: Self-Inking Return Address Stamp

Buying our first house gave me the excuse I've been needing to order a return address stamp.  A little hard to justify when we were renting, but absolutely essential to home ownership!

There are a zillion options on ETSY so I didn't bother looking elsewhere.  Since I was a liberated woman who didn't change her name the day after the wedding, all the really cute monogramed stamps were out.  Bummer!  Honestly, that's my only regret about keeping my name...not having a monogram.  And, if that's my only misgiving, I suppose I made the right choice.

So, anyway, back to the ETSY selections!  Eventually I settled on this one from Savethedate Design's shop.


Cute.  Simple.  And solves the mis-matched last names issue by eliminating them all together!  

About a week later our fancy new stamp arrived in the mail. 

She packages her stamps in little fabric drawstring storage bags - a nice touch.  Obviously I covered up our exact street address (you all know it anyway!) but you get the idea.

My excitement over this swell new self-inking delight (combined with a couple sick days at home) motivated me to finish up our holiday cards early.  Now that's an amazing stamp =)

Saturday, November 19, 2011

Pinterest Project: Glittered Light Bulbs

I finally made something I found on Pinterest:  Glittered Christmas Bulbs!  Though the instructions were minimal, the project was easy, inexpensive, and fairly quick.  The gratification was big =)

What you need:
* Old Christmas bulbs
* Glitter
* Modge Podge or Decoupage
* Paintbrush
* Paper plate
* Cookie Sheet
* Waxed Paper


Both Recollections and Martha Stewart make Extra Fine Glitter.  It was perfect for this project - good coverage, and not  as chunky as regular glitter.


Each bottle is $4-$5 each, but I hoarded Michael's 50% off coupons and spent $6.50 total.  I do love to save!

Martha's glitter was more expensive, but I didn't really see a difference in the quality.  Both lines have awesome color choices.

Let's get this show on the road!  Remove the bulbs from their string.  I scooped up this set at a garage sale and paid 50 cents.  Again with the savings!  Of course, they were grimy from life in someone's garage so I had to wipe them all down first.  Still worth it.  


Using the paintbrush, apply a medium layer of Modge Podge over the colored surface of the bulb.  I chose to leave the metal base exposed.

Working directly over the paper plate, shake glitter over the bulb.  It was easy to miss the pointed tip so I had to go back and catch those little bare spots.


Still over the paper plate, tap the excess glitter from the bulb, allow it to dry just a bit.

Lay them on your wax-paper covered cookie sheet to dry completely.  I left them overnight just to be on the safe side.

Return the remaining glitter to the jar.  Covering 24 bulbs used very little glitter so I have plenty left over for other projects.


And that's all there is to it!  I'll be exercising a lot of restraint to keep these in the closet until after Thanksgiving =)


Saturday, November 5, 2011

Fast Freddie's Balsamic Vinaigrette

Need a good recipe for vinaigrette?  Just so happens I swiped one from my step-dad, Fast Freddie.  It's quick and easy, and goes together from ingredients you probably have on hand.

You need:

*Olive oil
*Red wine vinegar
*Balsamic vinegar (optional, but so good!)
*Basil
*Lemon juice
*Salt
*Pepper
*Garlic
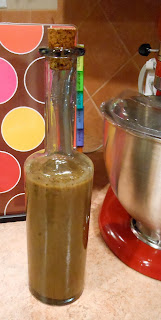
*A cute bottle for your finished product
*A blender


The ingredients are not measured exactly, so you can make as much or as little as you'd like.  My bottle holds about 2 cups of dressing so I use a 1/2 cup for each "part" in the recipe.


In the blender, combine:
      3 parts olive oil
      1 part vinegar (I do mostly red wine, and a little balsamic)
      minced garlic (I like garlic - two cloves for me)
      basil (a bit less than a tablespoon)
      salt (to taste, maybe a teaspoon)
      fresh ground pepper (to taste, about a teaspoon)
      1 shot of lemon juice
The next step is really key to getting good dressing.  First, fail to notice that your blender is switched to the "on" position.  Next, ensure that the lid is off.  Better yet - place the lid far down the counter so it's nowhere near your blender.  Now lean over and plug the blender in.  Do all of this while on the phone with your mother so that, when the s**t hits the fan (literally...sigh) you can squawk in her ear about "olive oil everywhere!" and drop your phone in the sink.  


Awesome!  Once you've cleaned up your mess, changed your oil-splattered clothes, and called your mother back to ensure her you weren't nose-to-nose with a burglar, you can blend up your dressing and get on with your life.

 Confession: there was a moment here when I considered pitching this whole mess and starting over so I could have nice tidy pictures for this post.  But then I realized two things.  First, that's wasteful!  Secondly, I am SO not the gal with the picture perfect life, coiffed and spit-polished for presentation on her award winning blog.  I make messes and screw things up and think that pulling the covers up counts as making the bed.  So I'm keepin it real.  This is how I make salad dressing.  Go ahead and judge me, Martha.  My counter is cleaner than your criminal background check.  Oh snap!   

Now you have a tasty bottle of homemade salad dressing and a freshly cleaned kitchen.  Enjoy!  


Your dressing should be stored in the fridge, and you'll notice the olive oil and vinegar separating.  Not to worry!  I usually take the dressing out of the fridge while I'm making dinner so it can warm up a bit and then give it a good shake.  Got your buns in the oven?  Set the dressing bottle on the stove and it will warm up nicely.